Puffy Paint Bracelets
I have the cutest craft for you, friends. You know I’m all about simple, fun and easy and this craft is all of those things. And it’s wearable, so it has a real use. Crafts with a practical side are always a plus for me. I mean, I like wood birdhouses, but you can really only have so many.
My daughter and I have made these a few times already and they always turn out cute. This time I’m making them for Halloween boo bags. (Stay tuned for that post!)
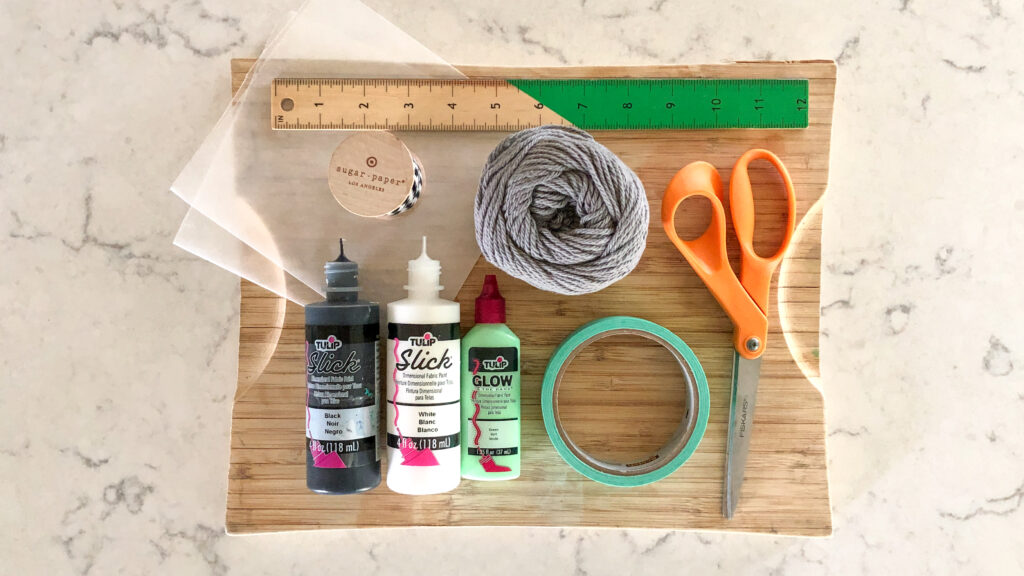
You’ll need:
- Puffy paint – your choice of colors
- String – I prefer yarn or cotton twine because it’s inexpensive and soft
- Scissors
- Tape – I like washi tape, but any tape will do
- Wax paper
- A cutting board, cookie sheet or piece of cardboard
- Ruler
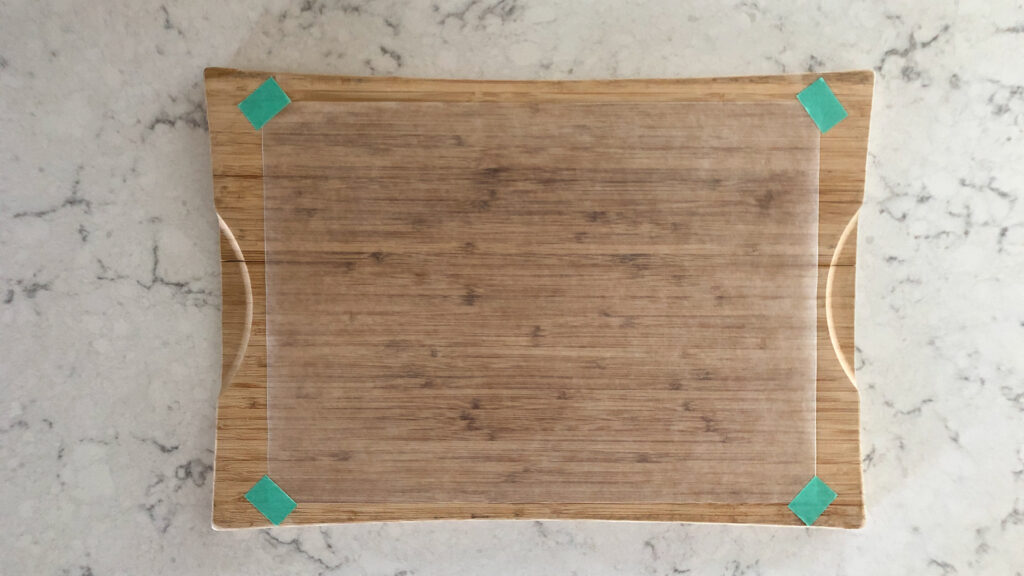
Step One – Prep Your Work Surface
Tape a piece of wax paper to a portable, hard surface. I used a cutting board, but a cookie sheet or piece of cardboard would do just fine. These bracelets can take a long time to dry, so you want to be able to move your surface around and out of the way.
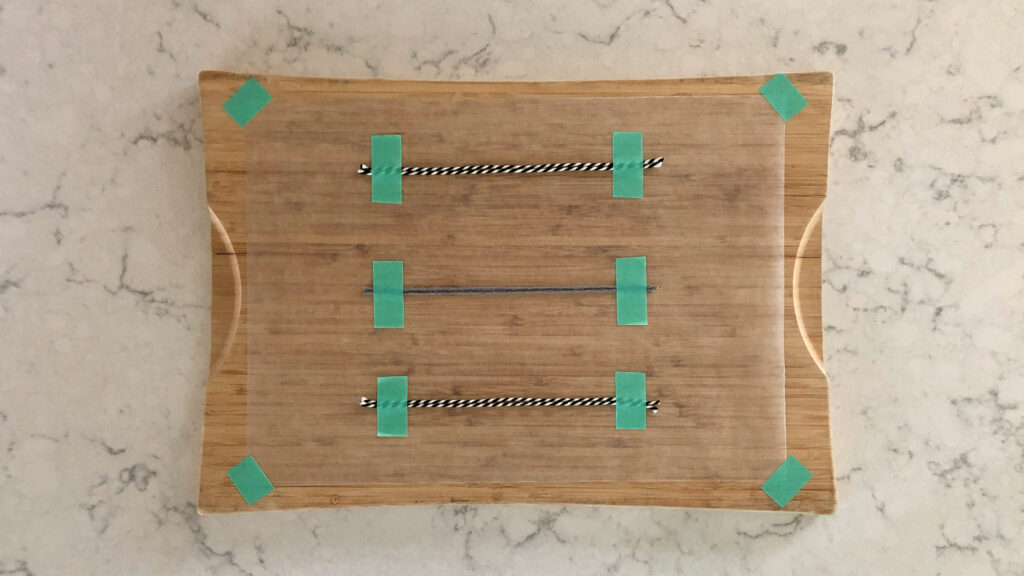
Step Two – Cut Your Yarn
I use two pieces of yarn per bracelet. I like thicker bracelets and this gives the puffy paint more surface to stick to. For this project I knew I was making bracelets for kids, so I cut the yard to 10″. For adults I would cut to 14″ or so. These measurements are all estimates – make sure you err on the side of too long. It’s way easier to cut off extra length than to have a hard time tying a knot.
Tape your string down to your work surface. Pull the string taut but not tight.
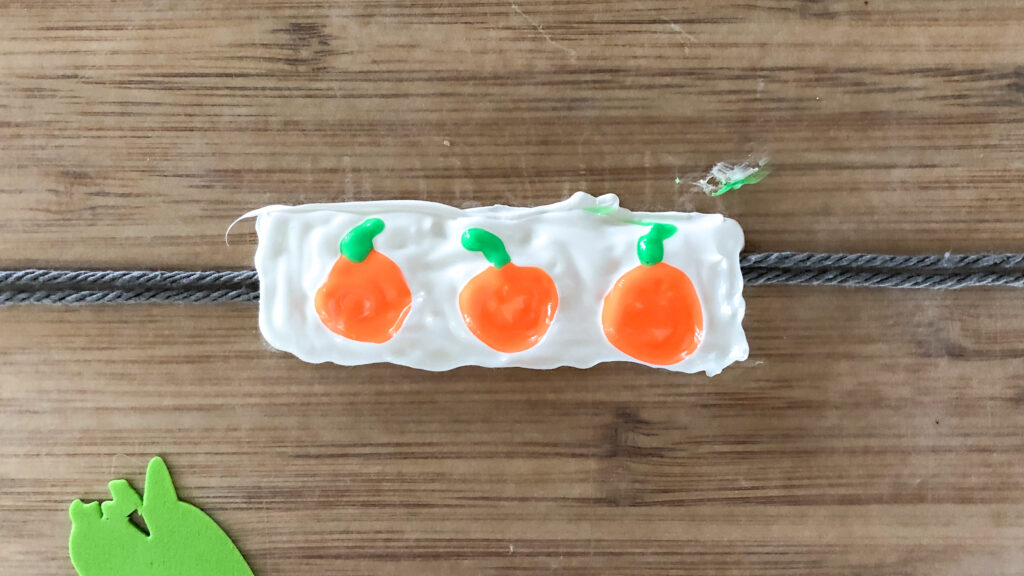
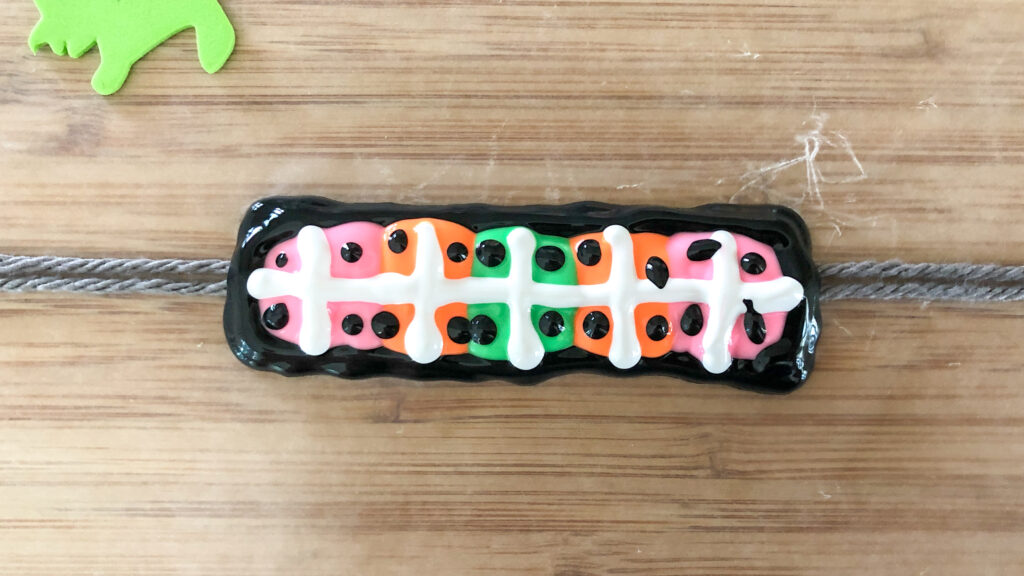
Step Three – Decorate
This is the fun part. You have a lot of options here, so get creative. The object is to fully coat the string. I start with a solid base layer and then decorate on top.
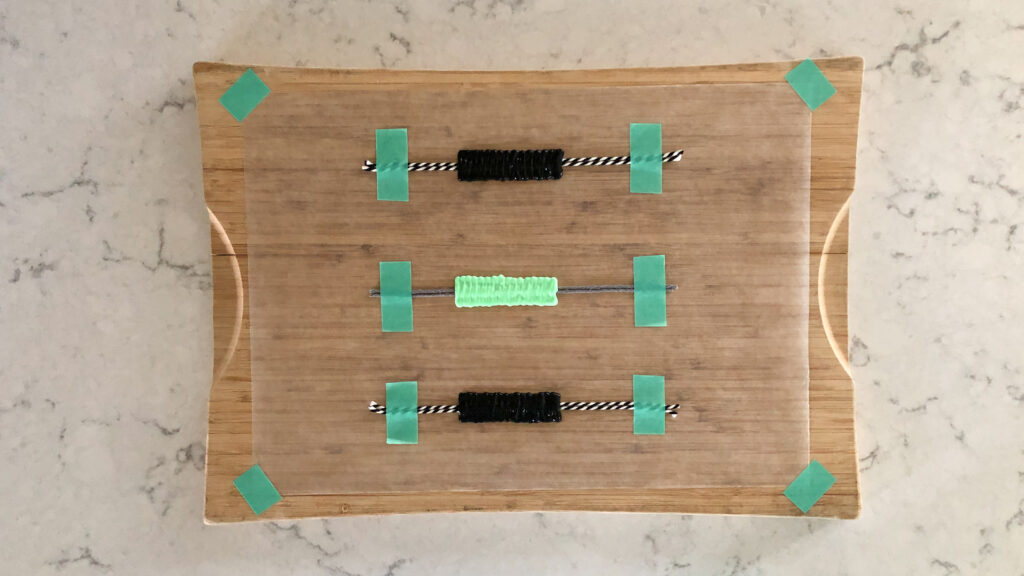
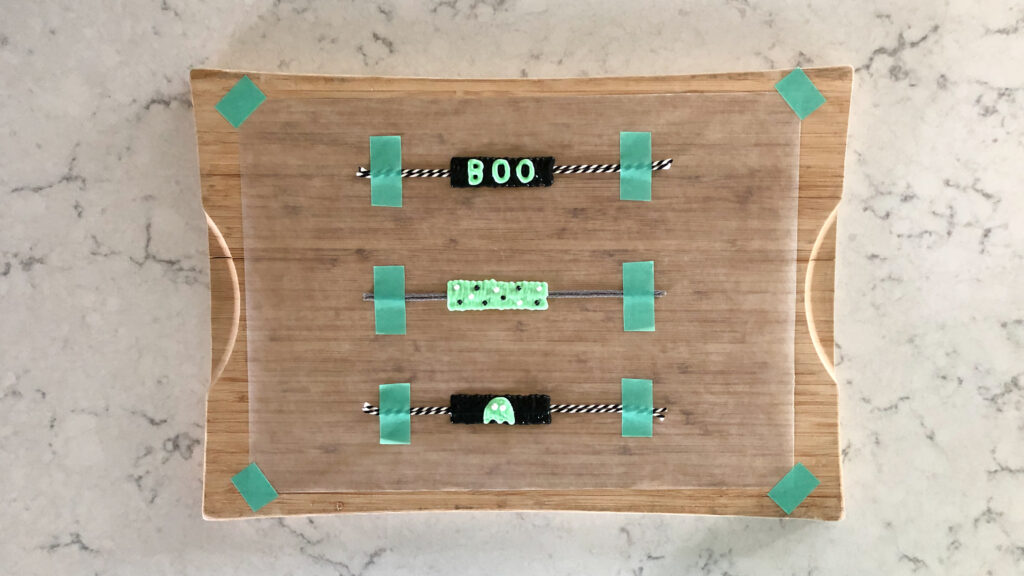
For youth bracelets, I estimate about 3″ of decorated space. This will cover the top of their wrist but not wrap around too much, allowing for easy knotting. Again, think about who you’re making your bracelet for and estimate from there.
Or just eyeball it and have fun.
Step Four – Drying
This can take a while. One big factor is how much paint you used and how thick you laid it on. After 24 hours, touch them lightly to see if they’re dry. They’ll need to be fully dry before you can pull them off the wax paper. Make sure you’re patient here – it’s a real bummer to pull them up too early.
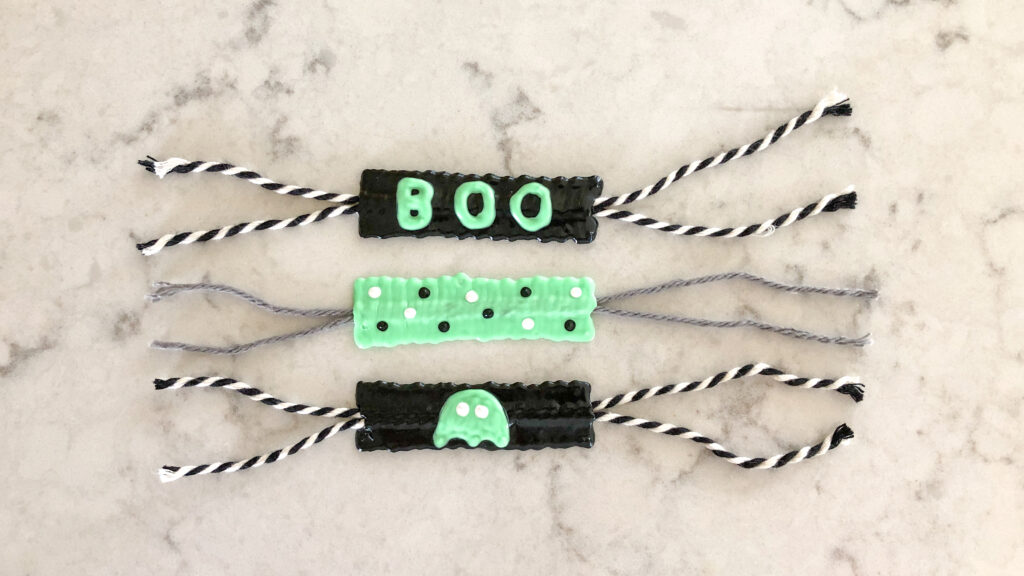
And that’s it! Puffy paint bracelets make a great rainy day activity, birthday craft, or gifts for a friend or teacher. We’re using them this year in boo bags. Stay tuned for that post next week!
1 thought on “Puffy Paint Bracelets”